tisdag 20 juni 2017

Bed curtains: Part 1

We had our first camping event in the tent we bought last summer, and after this trial run we now know abit better what we need and want to add to make our tent comfy and inviting.

First project is begun. I'm making curtains to go around the bed. I've calculated that I will need six panels plus the "roof". The idea is to make a starry sky on the inside. The outside...still undecided.

As it develops I will try to keep you posted on the progress.

The first panel was kind of a trial run, I haven't painted with textile colors in a long while so I just dove right in. I had two dark blue sheets and bought silver paint. Since it was a kind of a spur of the moment thing I did it the kiddie way. I made a star shaped potato stamp! It gave me the basic shape and then I just went at it with a brush. I wanted to add something more than stars so after some searching I found this image from somewhere in Istambul (need to sort this reference out later)


I drew the comet on paper, traced the outline and filled it in.

The first panel was finished yesterday and this is how it looks:


Now onto the second panel. I wanted more celestial phenomena and found this image from the book of miracles, 16th c german. ( another reference to chase down)


A meteor shower, that would be cool and then I started thinking. Tracing would be tedious so I tried a method that I use when marking for smocking. I made a plactic template, put a couple of pieces of tape to secure them in place and dusted tailors chalk with a make-up brush and it worked!


Template taped in place


Dusted with tailor's chalk


Remove the plastic template


Fill in with silver paint!

Now I just need to keep painting a lot of these....


torsdag 12 januari 2017

The Good Wafers

Annika Madejskas foto.
Photo by Annika Madejska


I do other things aside from textile adventures and loppis hunting, sometimes I also bake. I love to make tasty treats but rarely make the time and effort. My mother is a fantastic cook and the amount of knowledge stored in her brain just amazes me. I realize that she wont be around forever and I need to learn as much as I can from her, so this christmas my mother agreed to teach and help me make the traditional wafer "Gorån" (good wafer). This is result:


The recipe:
(which is supposed to make 35 - we got about 60)
210g melted butter - my mother uses the normal salted kind.
200g sugar
2 eggs
2 eggyolks
400g wheat flour
1 tsk hjorthornssalt (Ammonium Carbonate) What this is is explained here: http://www.swedishfood.com/hjorthornssalt

Edit: I now have learned that in german it is called Hirschhornsalz.

Traditionally this was made in a cast iron thingy with pretty patterns that would press into the wafer:

 http://mm.dimu.org/image/012s83zdvkcN?dimension=1200x1200

When I grew up my grandmother still used hers, but my mother had an aluminium one that made three at a time but the inner one often got too hot and overbaked so she only made two at a time. Now technology has entered the house and my mother owns this electric iron:

 Thérèse Petterssons foto.

It has the benefit of controlled temperature and lights that signals when it is ready to do what it should! Very efficient compared to the traditional ones.

The dough is the part where the experience really comes into play. I had no idea about how the dough should look and feel when ready. Depending on what type of iron you are using you either want the dough loose enough to expand into all the crevices or hard enough to beable to use the rolling pin and make a sheet as thin as you can while still be able to handle it...carefully...
According to the mother it is the depth of the pattern that determines if you roll out the dough or make a sausage that will expand into the wafer iron. The expanding kind is also often a thicker wafer than what you can make in the electrical one.

So depending on what type of iron you are using, make the dough accordingly. The amount of flour is what you adjust to get the dough you need.. Since the dough has to sit overnight it is much, much looser when you first make it than it will be the next day. This reminds me a lot of how our gingerbread cookie dough behaves. The dough is best kept in the fridge, and we kept ours in the fridge during the bake since when it gets warmer it also softens and gets almost impossible to handle. Another benefit of keeping it in the fridge was that my father was not able to steal as much of it as he would have liked.

Dough ready, iron warmed up I got to do the rolling. I took just enough dough to make one bake in the iron and with liberal use of more flour I got it really nice and thin. My mother has a template in plastic that she uses when cutting the rolled out dough. The template is the size of the finished wafer but you cut away the excess dough so its about 1-2 cm larger than the template. Carefully place it in the iron - there is no chance to move it after it has touched the iron so place it right! Now my mother took over and this time the wafer was done in about a minute and a half. Nice golden color is what you want, and it quickly burns. Then you immediately cut away the excess so you end up with the nice wafer - and a lot of remnants. Those can keep hungry dads at happy despite not being able to get to the dough.


This is what we ended up with:


Next time I will try to convince my mother to teach me how to make the rolled up wafers:

Thérèse Petterssons foto.

torsdag 28 juli 2016

Socks part 2 - making a pattern

Please, do read all the way through befor you begin - if there is a point where my description doesn't make sense to you you will not be as frustrated and have time to ask me or someone knowledgable in hose or sock making! What will you need:

paper (newspaper will work) and pen

Wool suitable for socks

Tailors chalk

ruler

pins

scissors

and preferably a second set of eyes and hands since it is harder to get a good fit on your own.


Start out on paper by making a sole - draw around your foot while standing:

 
Measure across your fot at the highest point and note the number somewhere. Mark that corresponding line out as well on the paper. Measure around the back of the sole - the measuremant from those points - you can just make out that notation on my pattern. I also took the measurement from the toe to the point where the flap will bend - app. where foot becomes leg I guess.
 You now have your sole pattern:

making the top:

Draw out the flap: Mine is almost square: 9 cm at the top and 8 cm at the bottom, which gives the pattern a slight angle but in reality the flap will end up square when hemmed.


Use the measurement from the planned position of where the flap will end up on your leg to the top of your toes - mark that point on the paper.

Use the second measurement from your highest point all around the heel and divide in half - add those as the "back flaps". I drew at right angles a 10 cm line on each side. That will probably work well for all adult feet.

Then raw a rough likeness of the pattern I have adjusted to your measurements - add a hefty seam allowance to make you able to adjust the fit as needed.
You now should have something looking like this:


This is how my new paper templates compares to my original pattern:

Now it is time to do it in wool fabric!
cut out and add remember to have seam allowance in the wool fabric. - you really will need have something to grab hold of when pinning.

Now the fun starts:

Pin the back seam so you can comfortably get in and out of your sock but still have it looking like you can have a reasonable fit:

Sew that seam - I did this when I made the first pattern with looong stitches on the machine - but only because it was loaded and ready - otherwise it is as quick to do a simple seam by hand. Reason for basting is that pins hurt...and you will have enough pins to worry about anyway!

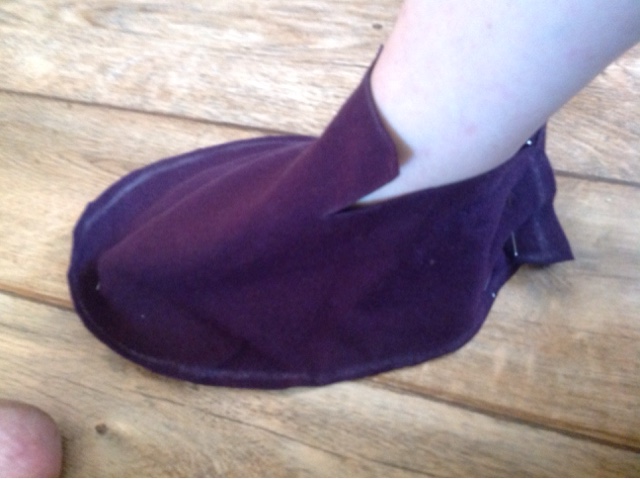
Put on the top pattern, place the sole piece on the floor, then place your foot on top of it and and start pinning them together! (this is where you either are an octopus or have an assistant)
Make sure that you pin close to the floor or you will end up with a seam higher up wich usually is not comfy at all! You also may have to adjust your back seam at this point. Just make sure you can remove the sock!


When you think you have a good fit; carefully remove the sock.

You most likely will have quite a lot of excess fabric:


Trim the edges down to more sensible sewing allowances:

upside down

Sew along the sole. Double check that you have a good fit. You can now trim the sewing allowances down to be ready for felling. I make the sewing allowance of the sole be a few mm longer so they will cover the tops when felled.

Now - sorry, but there is no other way - take the sock apart. Either keep this as your pattern - or make a paper one by drawing out a copy of your sock.


Make your socks! And remember if you make adjustments later - do that to your patterns as well!

As for my newly made pattern - which I kind of had to make since I realised that there was no way I could explain how to do this only in words - compare the new in purple to the old one in red:


Close enough I'd say!


Hose and socks part 1

 
I came home from Double Wars realising I only had one good pair of hose. Time to do something about that and I brought out my trusted hose pattern and in short order I finished two pairs, one of which can be seen here:
 

Summer was not so far away (this was in mid-May) and I thought about summer wear. I remembered Whiljas trossfrau socks and decided to make my own. (Whiljas corner - the trossfrau sock)
I had also seen my friend Petronilla of London's photos of a linen sock from Regensburg. In appearance it reminded me a lot of the 16th c shoes Erik had made for me. I used that pattern for a toile and fitted the first attempt:


I then used the fabric I planned to make socks of, a melton from Medeltidsmode. I made a sock, fitted and ready for felling with all the hems trimmed - and then I took it apart; this is now my pattern. I can now just cut and sew!


I then went for linen socks. It quickly became obvious that linen behaves differently than the wool did so I made a new "trial" sock and now have two slightly different patterns.


I have since then made a pair of yellow, black and purple wool socks, and a pair of white linen ones. Addictive "sockers"!


Now a lot of people have told me they want socks so I guess my next post will be some kind of instruction on how to make a pattern :)


onsdag 8 juni 2016

Forgot your hat? Make a new one!

a.k.a "The pillow case hat" - and this too is up on my old blog:

This is the most basic of all the hats. Pattern's dead easy, just one big square, the only finicky stage is when you fit it around your head but otherwise i'ts just straight lines and not that many of them to make this type of hat:


Instructions:
  • Cut two pieces 35cm X 70cm. Put the right sides towards each other.
  • Sew along the edge with your usual seam allowance. Leave an opening so you can turn it inside out. Trim the corners and turn. You may want to iron it flat depending on the fabric. Fold it in half.
  • Here comes the trickiest part of the construction, and the hardest to describe in writing: You are now going to prepare the hat for the side seams. What you need to figure out is how high your brim is going to be. I folded mine so it’s 14cm high. Put a pin as a marker on all side edges. That will mark the bottom edge (the fold) of the hat. If you’d sew it together along the sides it’d be way to large and if you look closely at the pictures the brim looks likes it overlaps. So adjust the size of the hat by overlapping on both sides. I chose to let the front piece overlap on both sides. Pin it along the edge both on the inside and outside. Sew it together both on the inside and the outside with as invisible stitches as you can manage. Fold the brim into position and continue to stitch the brims together about 4-5 cm. This will help the brim to stay up and not flop down even without some nice pin to adorn the hat.
  • The hat is ready to add the bling! 


I think it looks a lot like this one too:
 

The Black Hat with Split Brim and Bows

Another hat description moved from my old blog:


To make the brim for this hat: Cut four pieces ca 18cm x 18cm  Then use pattern piece A:


Instructions:
  • Cut 4 pieces of A, remember to add seam allowance! Take your 4 brim pieces.
  • Sew the four A pieces together along the sides. Fell the seams. Fold the hem and sew it down. You may want to shorten the bottm sides. To get the brim to look good I only had about 1 cm before the bulge started (after hemming).
  • Fold one of the brim pieces, a bit uneven, on one side of the fold you should have about 2c more fabric. This to make it easier to attach to the hat part.  Sew along the sides. Trim and turn inside out. Repeat with the other 3. Pin the pieces to the bottom edge of the hat. Fold in the bottom edge and sew it to the inside.
  • If you do nothing more this is what it looks like: 
 
To make the brim stay up. Make 4 ties. I finger looped mine, but you can make them any way you want. Make little bows and sew them to the brim. Mine are attached about halfway up the “split” and have aiglets at the ends.Now it should look something like this:
 
There are images where the brim has even more splits, so you kan adapt this to your liking. And for the ties you can use plain string without aiglets or to be even more extravagant make them out of a wider silk ribbon!